Progress, set backs, and success!

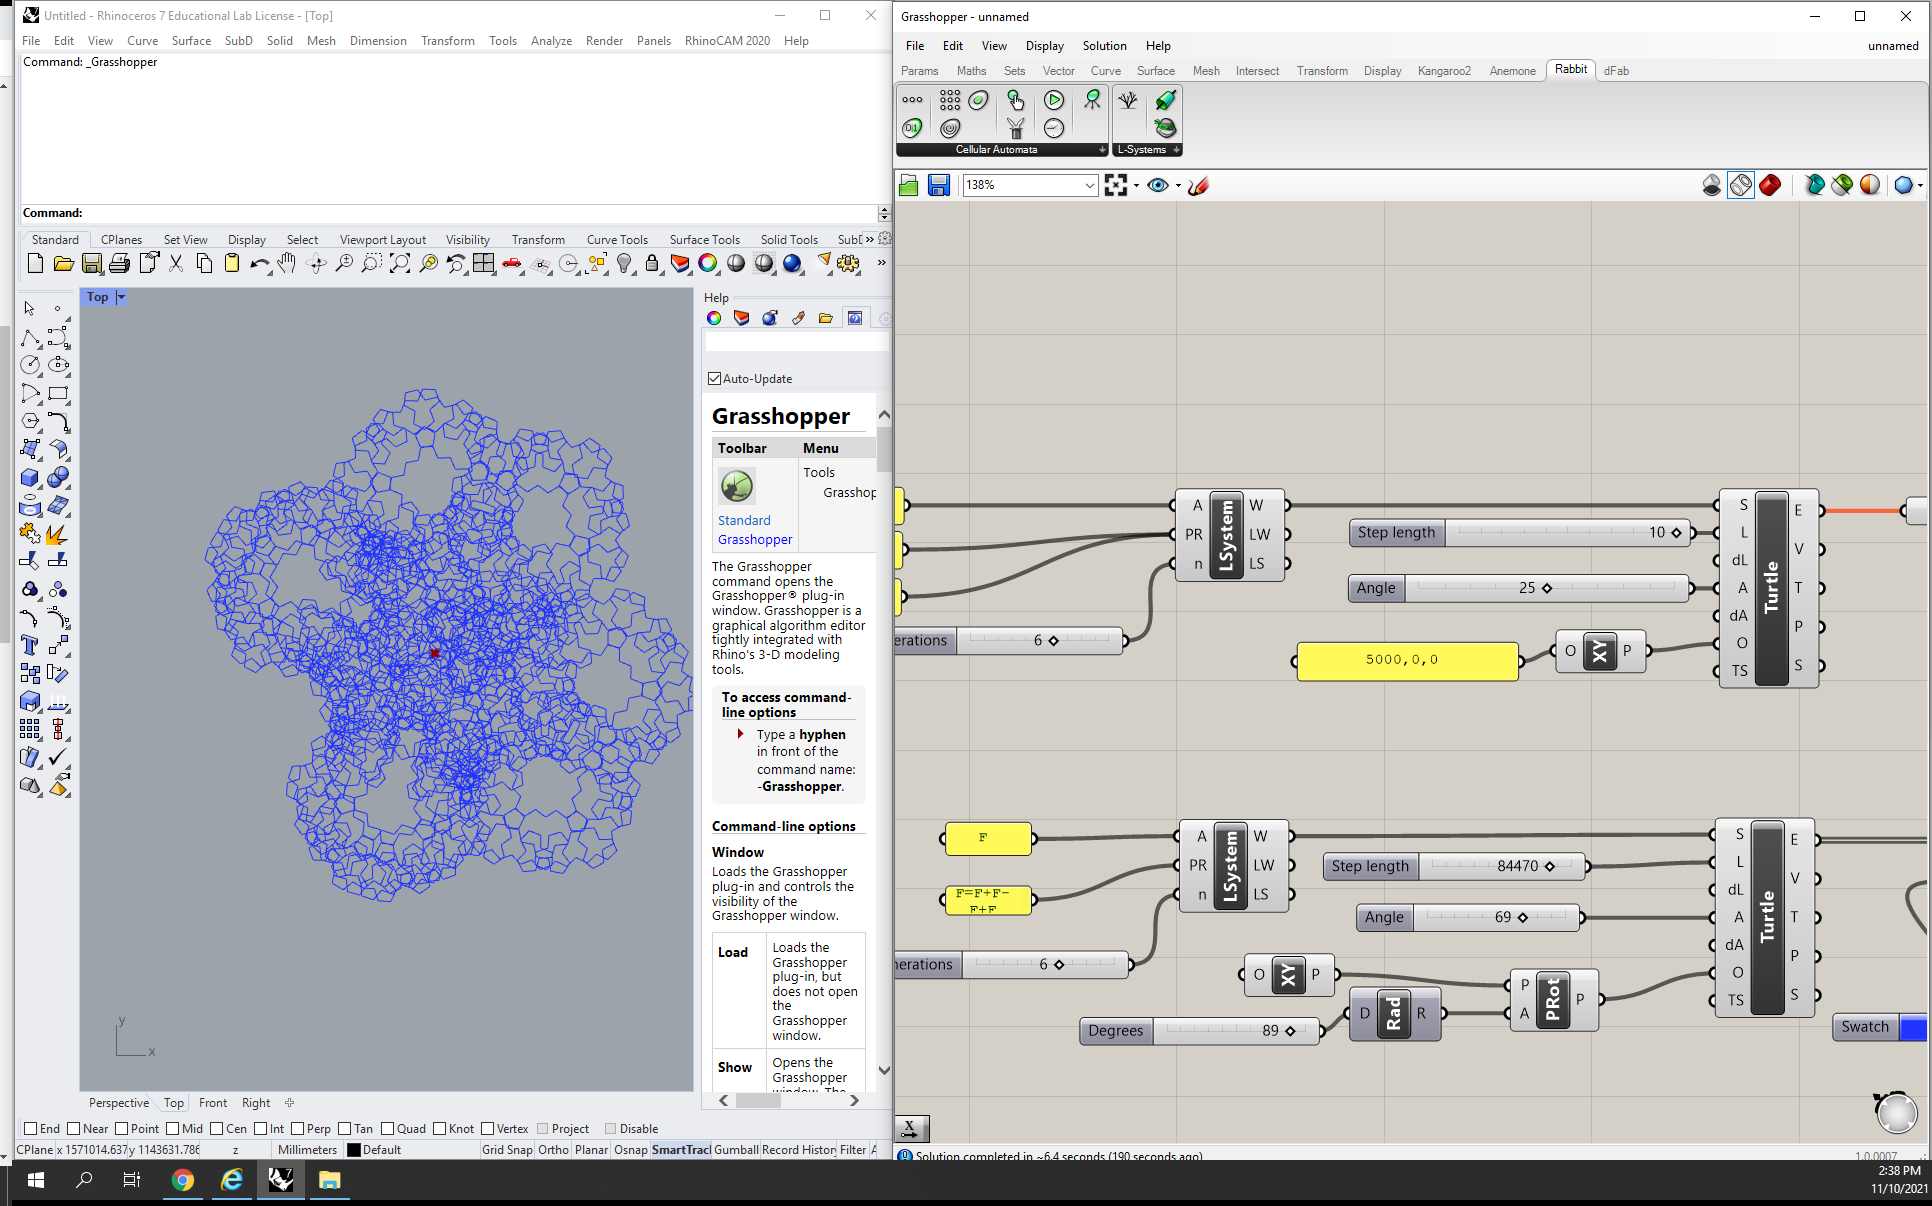
After experimenting with multiple scripts, Julian and I decided the Rabbit plug-in L-System tree was our best bet and decided to start experimenting with it.

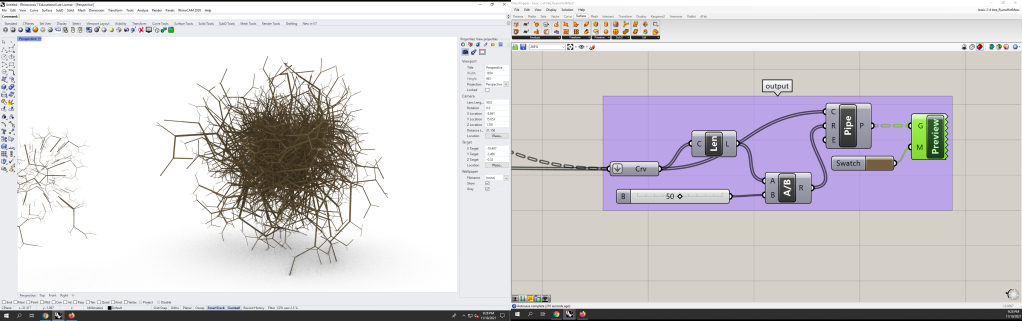
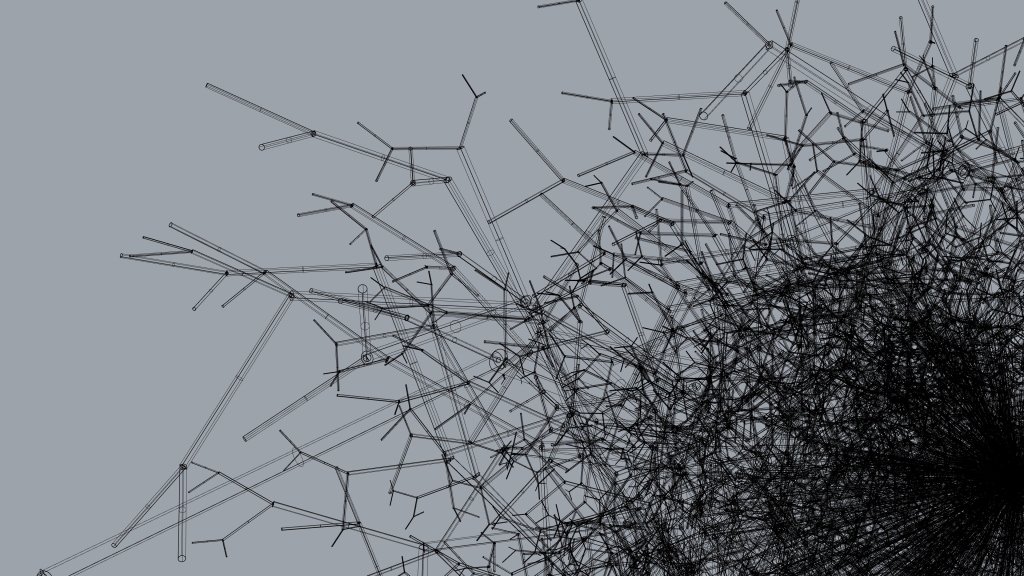
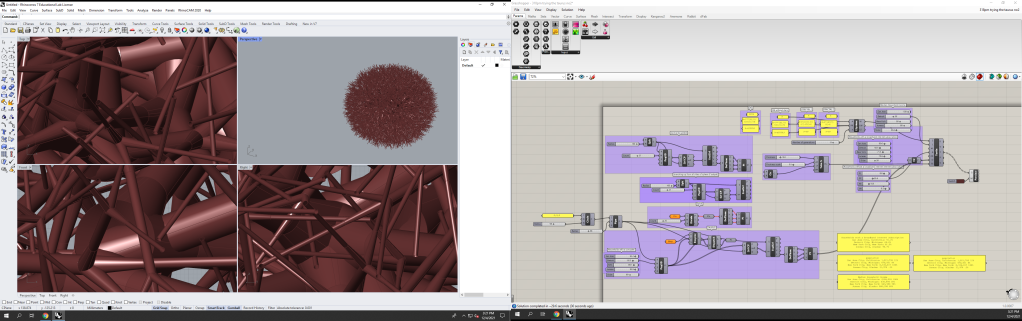
We first tried to replicate the tumbleweed structure we made in the hand-built L-system by centering the planes, normal to the surface with the help of Ryan, around a sphere and found this form incredibly intriguing.

I also began trying to change the L-system logic and encountered many odd shapes.

We decided we really enjoyed the sphere but wanted to connect the individual trees together at the base. We had the thought of using Julian’s Shortest Walk script and having the first point of this script start on the final point of the Shortest Walk, and this is where everything went wrong.

Due to heightened frustration and franticness, there is a lack of documentation of this dark period in our project. We suffered through hours of the script working, then breaking, then crashing and/or freezing our computers.

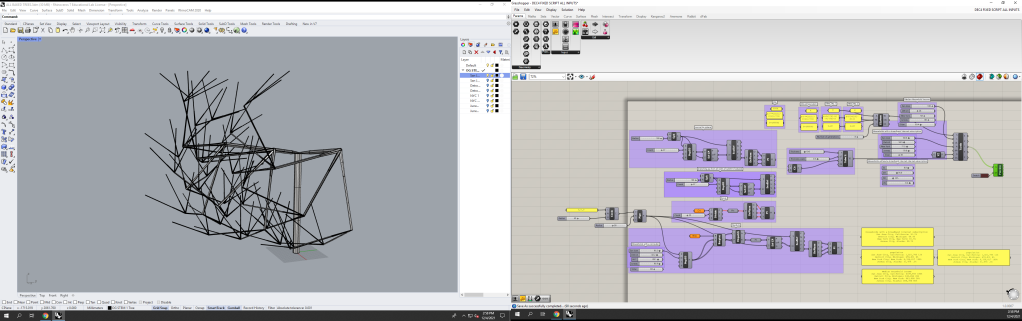
We eventually gave up on the Shortest Walk script, but wanted a more interesting shape to center our plant around. After experimenting with a few shapes, we decided on a torus. We had a few more issues regarding starting points and plane orientation but eventually figured it out after playing with pop3d and dividing segments on the surface.

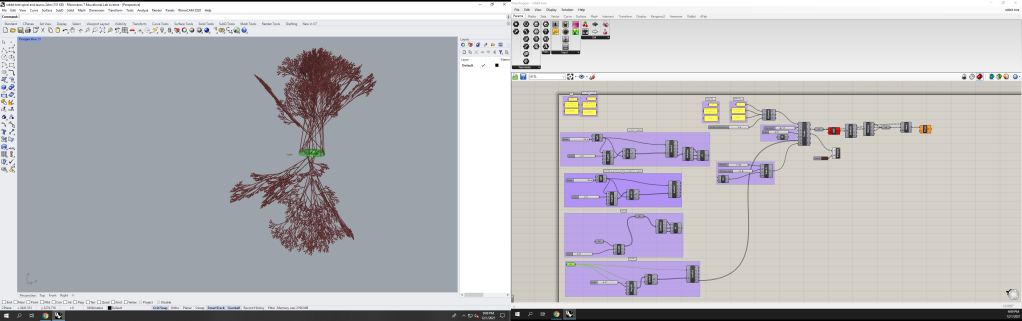
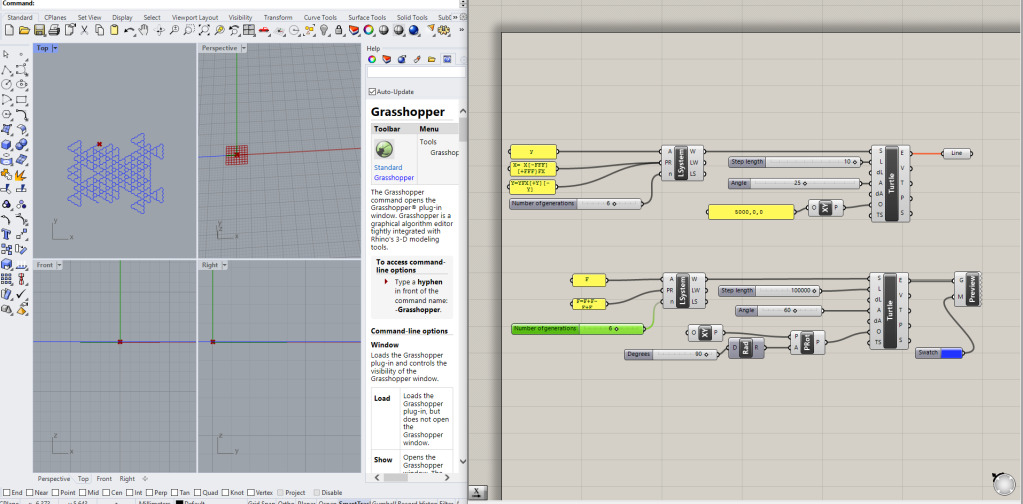
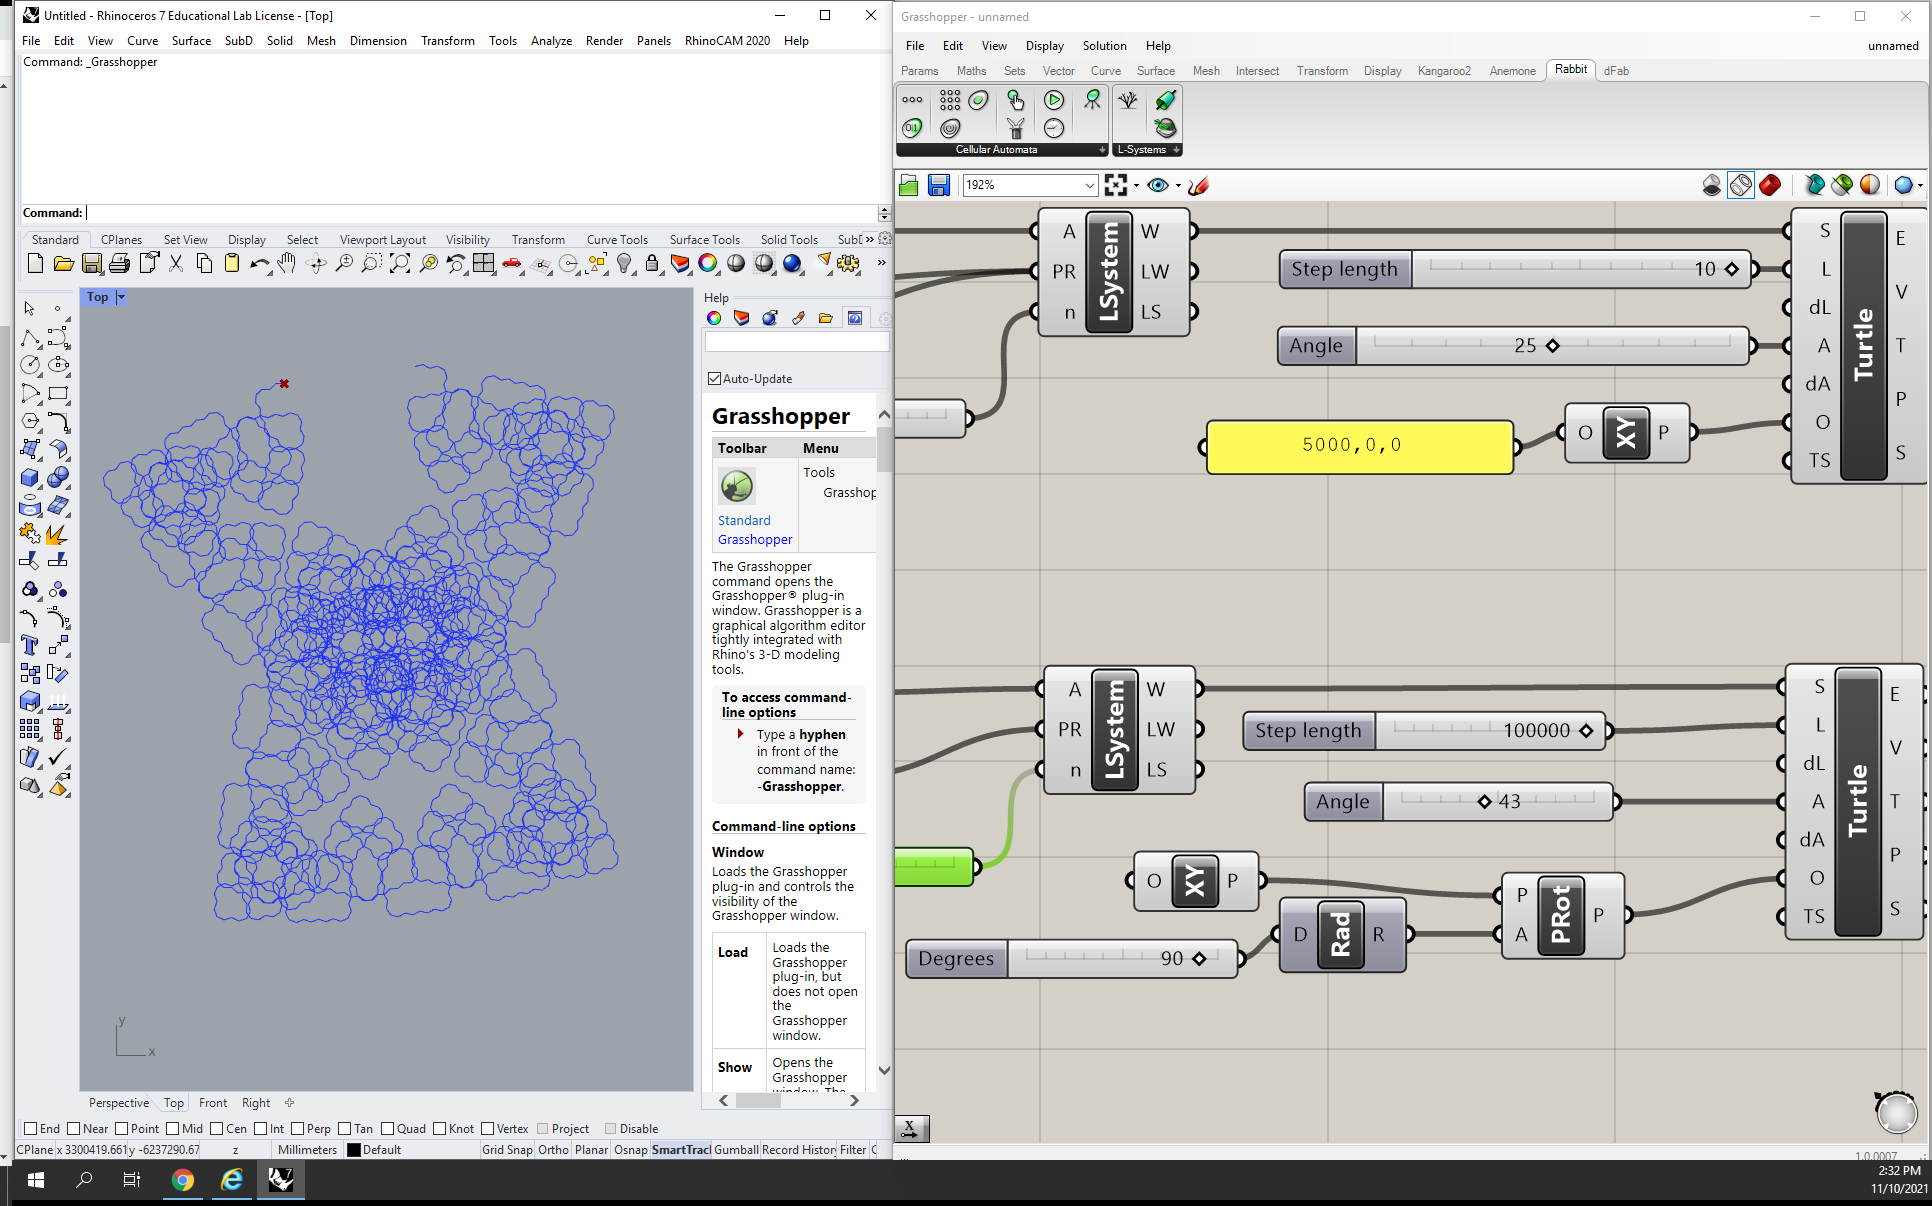
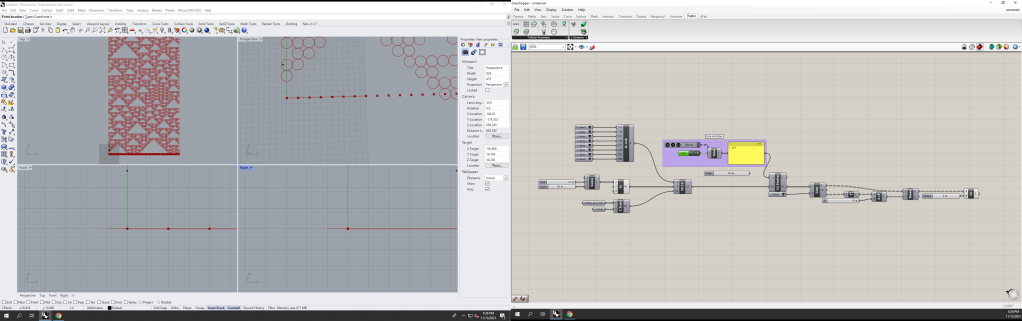
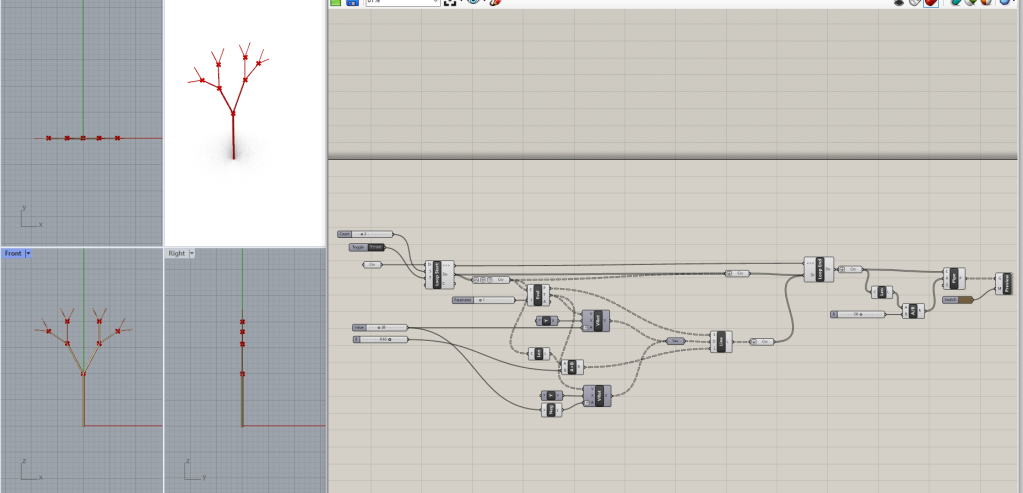
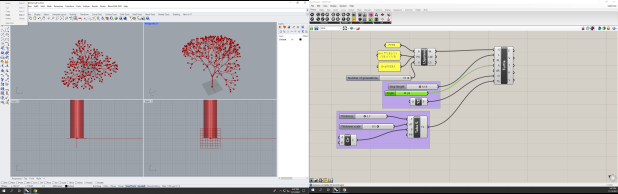
Then we could finally input data! We decided to measure internet access in 4 different cities across the U.S. and first output ordinary trees to ensure we had something at all. The angle of the branches represent the percentage of households in the city without access to internet and the height of the branches correlate to the relative mean household income within the city. Our 4 cities were Detroit, New York, San Jose, and Juneau.

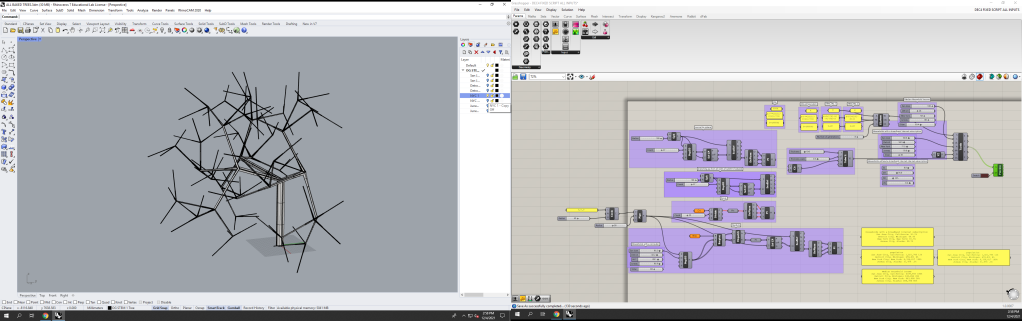
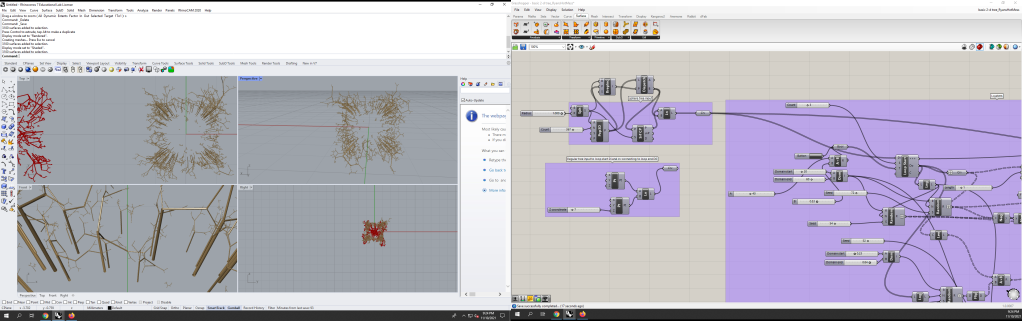
Then we started outputting them on the torus. Here, we included an input of % of households with a computer correlating to the number of trees branching off of the torus.

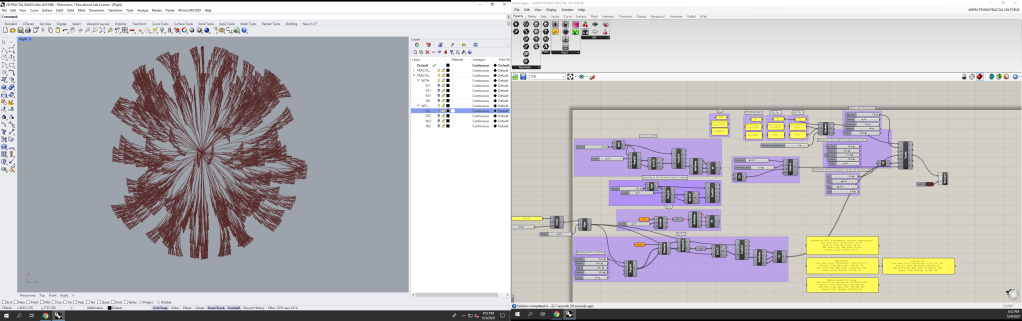
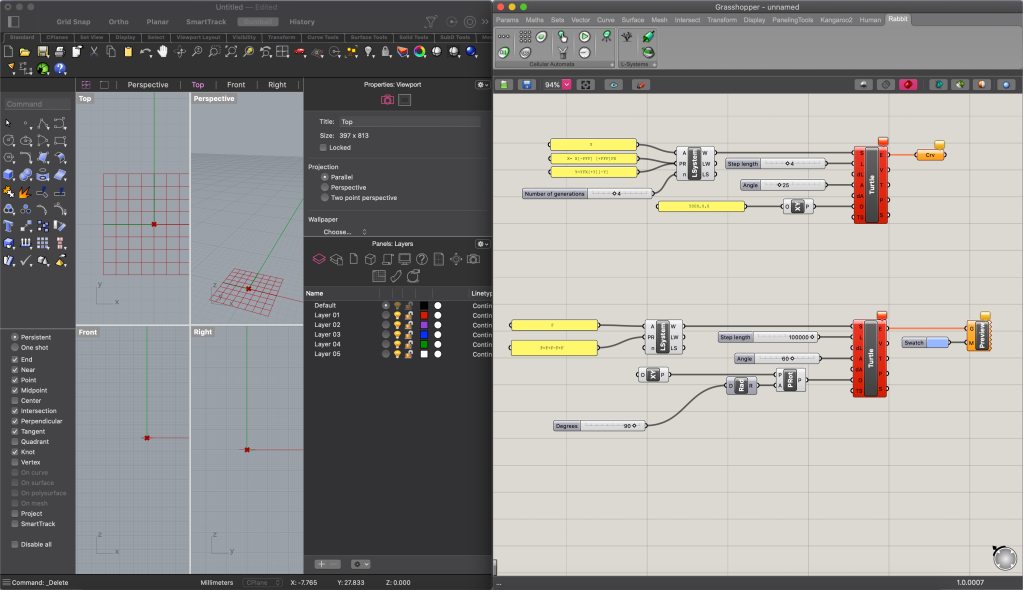
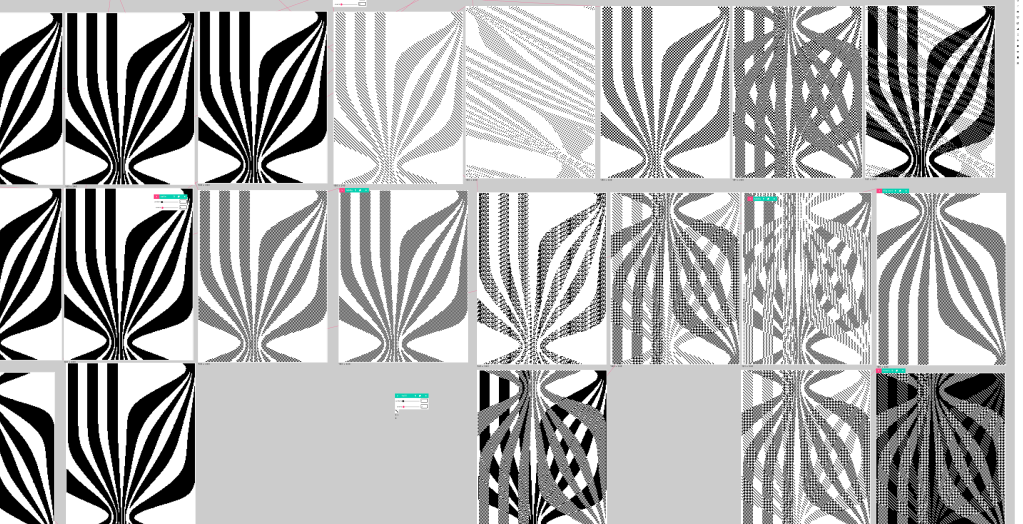
Finally, we also wanted to output different L-system fractals I had experimented with earlier, and input our data into the new form.

We also tried these on the torus but decided not to continue with this path!

More Grasshopper Experiments

This week, my goal was to try as many scripts as possible to help set Julian and I up for mashing scripts together next week.

After getting help from Ryan with my branching L-system script, I tried to experiment with it stemming from a circle.

1st attempt, failure
2nd attempt, branching from points on a sphere, both pointing outside inside of the sphere
3rd attempt, all branches pointing out
4th attempt, success! all branches pointing out from center of sphere, tumbleweed-like structure
2nd and 4th attempts

I then tried to use Rabbit, a plug-in that simplifies L-Systems. Below are my trials with a basic script that changes output based on a string of letters that symbolize the following:

  • F = Move forward a step of length d
  • f = Move forward a step of length d without drawing a line
  • + = Turn left by angle b
  • – = Turn left by angle b
  • \ = roll left
  • / = roll right
  • ^ = pitch up
  • & = pitch down
  • | = turn around

Julian and I were very intrigued by this output specifically and decided to add a piping component to this script.

1st attempt, very segmented with many holes
2nd attempt, tried joining line segments and got these funky branches instead!
1st and 2nd attempts

Following this, I decided to try a tree script with Rabbit to compare to my original branching script. I think this one came out much more organic! I want to experiment with it more and possibly have it stem from a sphere like with my first script.

The last script I’ve attempted so far is a 1D cellular automation script that activated new cells based on if cells around it are ‘alive’ or ‘dead’. Although this one does not branch or look anything like a plant, I’m interested to see if I can mash it with one of our other scripts some way.

1st attempt
2nd attempt
3rd attempt

[update] I’ve now also tried the 2-D version of the cellular automation script (animation shown in stills below)

L-Systems

Beginning on this project, I’ve explored a lot of L-System based scripts. L-systems work with a lot of fractal properties, branching lines out a determined number of times at a determined angle, which is perfect for creating plant-like outputs.

The first script I tried I found on a website called “generative landscapes” which has been extremely helpful in this process. This one manually built out the entire L-system. The script output came out as intended, a 2-D structure that branches out in the X and Y directions. However, when I messed with the number sliders, the output started getting funky. Rather than changing the angles of each branch and the segments that branch off of them, the branches began disconnecting from each other, not registering that the generations below have changed location. I’m unsure how to fix this.

I then moved on to Rabbit, a Grasshopper plugin that has an L-Systems component, making the script much shorter. I was hoping this would solve my problem with the previous script disconnecting, but unfortunately I kept getting an error message on the ‘Turtle’ component, saying it could not load file or assembly. I’ve done some googling and cannot find a solution for macs and am currently at a dead end. I’ve tried re-writing the script on a PC but am unable to download Rabbit for some reason, but I will keep trying.

I think there’s a lot of opportunity with this, as I can start basing my branching off of other shapes besides lines.

New Direction

After researching for and thinking about my original idea, I quickly grew to dislike it. I felt overwhelmed and bored by it at the same time, despite being very intrigued by the precedents I had found.

I began to brainstorm for new projects and landed on an idea to create a generative Grasshopper script with an input of location data (e.g. % of bike users in cairo, New York, etc.) and an output of abstract/alien plants. I’m interested in how they might differ by location based on these data sets that don’t typically affect plant life in the same way it might on Grasshopper.

After discussing with Alan, Julian and I realized we had parallel paths and decided to merge our projects to work together on the generative part of the script.

We’ve also been interested in bringing this project into Blender to experiment with its simulation properties.

Final Project Thoughts

As I’ve gone through all the workshops in this class I feel like I’ve gotten a start on so many of the skills I’ve always wanted to explore and really expanded my view of some of the work I was already making.

I originally came in to this class thinking I wanted to get a headstart on my thesis exploring woven reed structures but I have such a clear idea of my thesis that I feel like I would be making waste of this opportunity to try something different. If anything, I want to make something in this class that can inform my thesis rather than begin it.

Throughout my time at MICA i’ve been extremely interested in using Grasshopper for my architectural projects, and just recently discovered that I enjoy using it to create art as well. I’ve also really grown an interest in weaving using architecture to inform the few pieces I’ve created.

Something I found myself thinking about a lot during our last class was that I would like to explore the intersections of fiber, parametrics, and coding in some way. Having a process that goes between the 2D and the 3D, the digital and the physical has always been part of how I make work and I feel would mesh well with these components.

I would really like to continue using the TC-2 and possibly even the floor loom. My thesis revolves around rigid weaving, more in the style of basket-making, and I’m really curious to see what I could do with a more flexible weaving. Laura Devendorf showed us how she uses weavings as sensors, as inputs, but I’ve been interested in the thought of having the weaving embody an output. Could I program a weaving to move? To physically respond or communicate to its surroundings? Could I make it go between the 2D and the 3D fluidly?

Or perhaps I could delve into using grasshopper to output a design to be woven. Grasshopper can create so many different outputs with the same script, is there a way I could incorporate that variation in a weaving?

I still don’t have clear thoughts on the final product I want to make but I know what I’m eager to explore. I think using my architectural background to inform my work whether by process or visually is most intriguing to me right now, along with the TC-2, Grasshopper, and coding.

Some of my pieces that I feel are guiding me in the right direction:

Riso prints of layered grasshopper-generated pinchgrids
Weaving of a topography abstracted
grasshopper-woven bus structure
First draft of a woven reed structure

Control

This week we explored Arduino microcontrollers!

We started off by learning how to sauter by connecting an LED to a resistor. I’ve always wanted to learn how to sauter and was really interested to find out that the metals we are connecting should be heated rather than heating the lead directly.

Through a series of growingly complicated codes, we were able to experiment with controlling the Arduino’s LEDs through time, touch, and color. I found it really satisfying to be able to alter the code and understand how different components affect the commands.

I’m really interested in the connection between the Arduino and Grasshopper, as Grasshopper seems like a more simplified version of coding. I wonder if they can work together in some way or other.

Input: electronics projects

https://learn.adafruit.com/light-painting-with-raspberry-pi/software

Light Painting with Raspberry Pi

This project digitizes the concept of “light painting,” so that rather than a human holding and moving light to create images/words in long-exposure images, LEDs programmed by an arduino are used. This creates much more precise and surreal light paintings.

The input in this case is a digital image, which I find really interesting to think about the concept of “physicalizing” a digital image in order to create a new digital image. The code is as follows:

While I did try to read this, I’m not familiar with code and had trouble understanding most of it. What I am generally getting is the code identifying the dimensions of the image input, breaking it down to pixels and allocating the pixels’ on the LEDs. I think overall this gives a lot of room for experimentation in photography.

https://learn.adafruit.com/pianoglove

PianoGlove

This code, for a “piano glove,” seems really fun. The glove uses a color sensor to “see” whatever color it is placed on which then gets translated into an output sound. This way, you can use colors as notes.

The code for this one was incredibly long, so I’m not showing the entire code here.

To be honest, this code completely lost me. Despite the code including some comments explaining what would occur, I still wasn’t able to decipher it beyond seeing singular words I recognized. The previous example’s code seemed much simpler and totally set me up to expect a more legible code from this project! I would really like to get to a place where I can understand at least some of this, as I’ve always found the potential of coding incredibly interesting.

Get Physical

Finally getting to use the TC-2, we began to weave the two designs we created last week using ADACAD. The whole class’s designs were placed side by side on the file given to the TC-2, allowing us to weave them all at once.

It was really interesting to work through this process. The weaving was much more tricky than I expecting, the shuttle kept getting stuck mid-way through, it definitely took some practice to get the hang of how hard to push it across. It also took much longer than I was expecting, but was really worth it after seeing the final product.

After we were done weaving, we cut the designs apart. The weaving on the left was woven with conductive thread and therefore needed its sides sewn with more conductive thread to re-connect the severed lines for a complete circuit.

While waiting for the weavings to be completed, I used some conductive thread to do some finger weaving. I thought it would be interesting to test the electrical resistance because the structure dramatically changes when stretched. I crocheted the finger weaving after testing its original state.

The finger weaving’s resistance in its expanded state tested out to .49 Ohms. It halved its resistance when stretched, coming out to .24 Ohms. Interestingly, crocheting it brought it back to .43 Ohms, almost as much as its expanded state.

Experimental Drafting

In this workshop we explored AdaCad, an in-development program that is similar to Grasshopper in its structure, but tailored to creating weaving patterns.

To create my own pattern, I started by altering some line art I already created and imported it as an image into AdaCad. I then experimented with different weaving types and layering.

I was really interested to see that when I layered a twill and plain weave, I got a houndstooth-ish pattern. I’m really excited to see how this will look woven! I’m especially curious how the plain black spots will come out.

For my 2-pic weave, I followed the same script Laura Devendorf layed out for us, using a heart, rather than a twill, as the base pattern.

Overall, I found this a really fun experience. The program was easy to get the hang of. I’m really looking forward to using the tc2!